Set up Whapi in under 5 minutes
Follow these steps to connect your WhatsApp number, set up automations, and start sending messages. No coding required. Works with any Shopify plan.
Before you start
A Shopify store
Any Shopify plan works.
A phone number on WhatsApp Business App
Can be your existing number or a new one. To see chats, the number should already be on the WhatsApp Business App to use the coexistence feature.
A computer
Setup must be done on desktop with popups enabled.
Connect to Whapi as a Partner
What to do
- 1Open Whapi inside your Shopify admin (Apps > Whapi).
- 2Click "Connect WhatsApp" to start the setup.
- 3A Meta popup will appear. Press "Continue" to connect to Momo Digitals as a partner.
Common issues
Popup not opening
Your browser is blocking the Meta login popup.
Fix: Enable popups in your browser settings for your Shopify domain, then reload the page and try again.
Account locked
Meta detected suspicious activity on your account.
Fix: Wait 24 to 48 hours for the lock to lift, or contact Meta support to unlock your account.
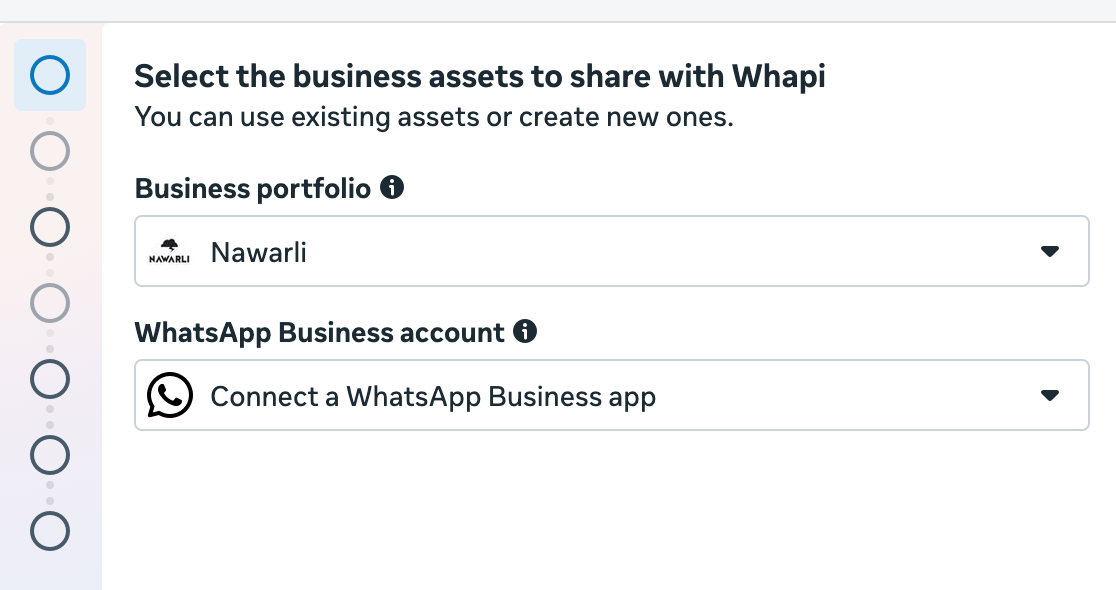
Select Business Assets and Chat Access
What to do
- 1Select the business assets you want to share with Whapi.
- 2If you want to see and reply to chats from your phone, choose "Connect a WhatsApp Business App".
- 3If you only need automations (no chat access from your phone), skip the WhatsApp Business App option.
Common issues
Wrong business selected
You have multiple Meta Business accounts.
Fix: Go back and select the correct business portfolio that owns your WhatsApp number.
Frequent disconnections
Too many linked devices or Meta sync issues.
Fix: Remove all linked devices from WhatsApp Business App (Settings > Linked Devices). Only keep the app on one phone.
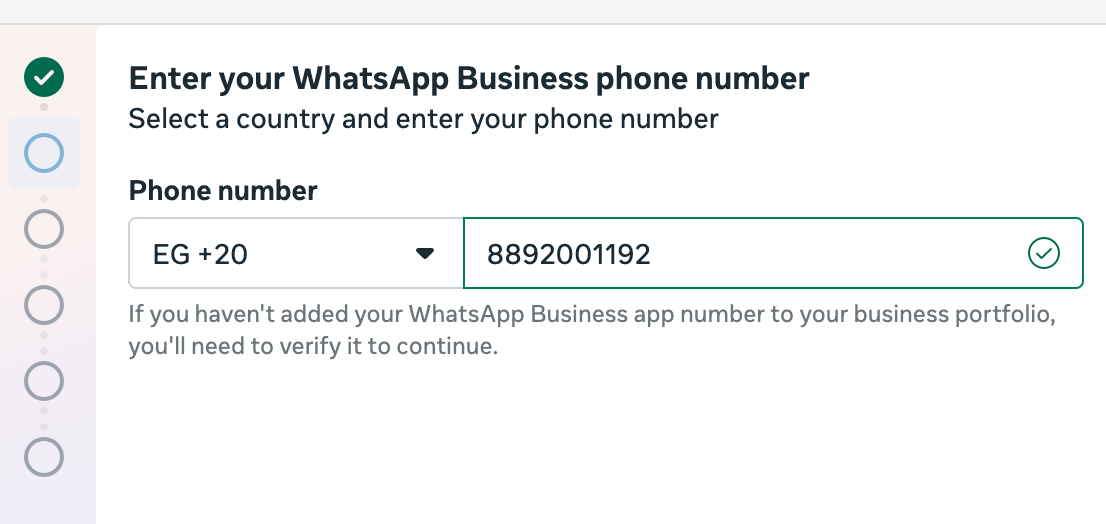
Add Your Phone Number
What to do
- 1Select "Add a new WhatsApp number".
- 2Enter the phone number you want to use.
- 3You will receive a WhatsApp message from Facebook.
- 4Press "Connect" and scan the QR code shown on screen.
Common issues
Number already connected to another provider
The number is linked to another WhatsApp API provider.
Fix: Disconnect it from the previous provider first, then try again. Or use a different number.
Number not eligible
Meta's eligibility check failed (new number, low activity, or flagged).
Fix: Use the number actively on WhatsApp Business App for a few days first, then retry. Or try a different number.
QR code scan failed
Unstable internet or app not responding.
Fix: Retry with stable internet, restart WhatsApp Business App, or generate a new QR code. If still failing, go to WhatsApp Business App > Account > Business Platform > Connect to a platform and use a manual code.
Set Business Name and Time Zone
What to do
- 1Enter your WhatsApp Business Account name (this is what customers see).
- 2Select your time zone.
- 3Click "Next" to continue.
Common issues
Display name not approved (Error 131037)
Meta rejected the business display name.
Fix: Use your exact legal business name without slogans or keywords. Resubmit.
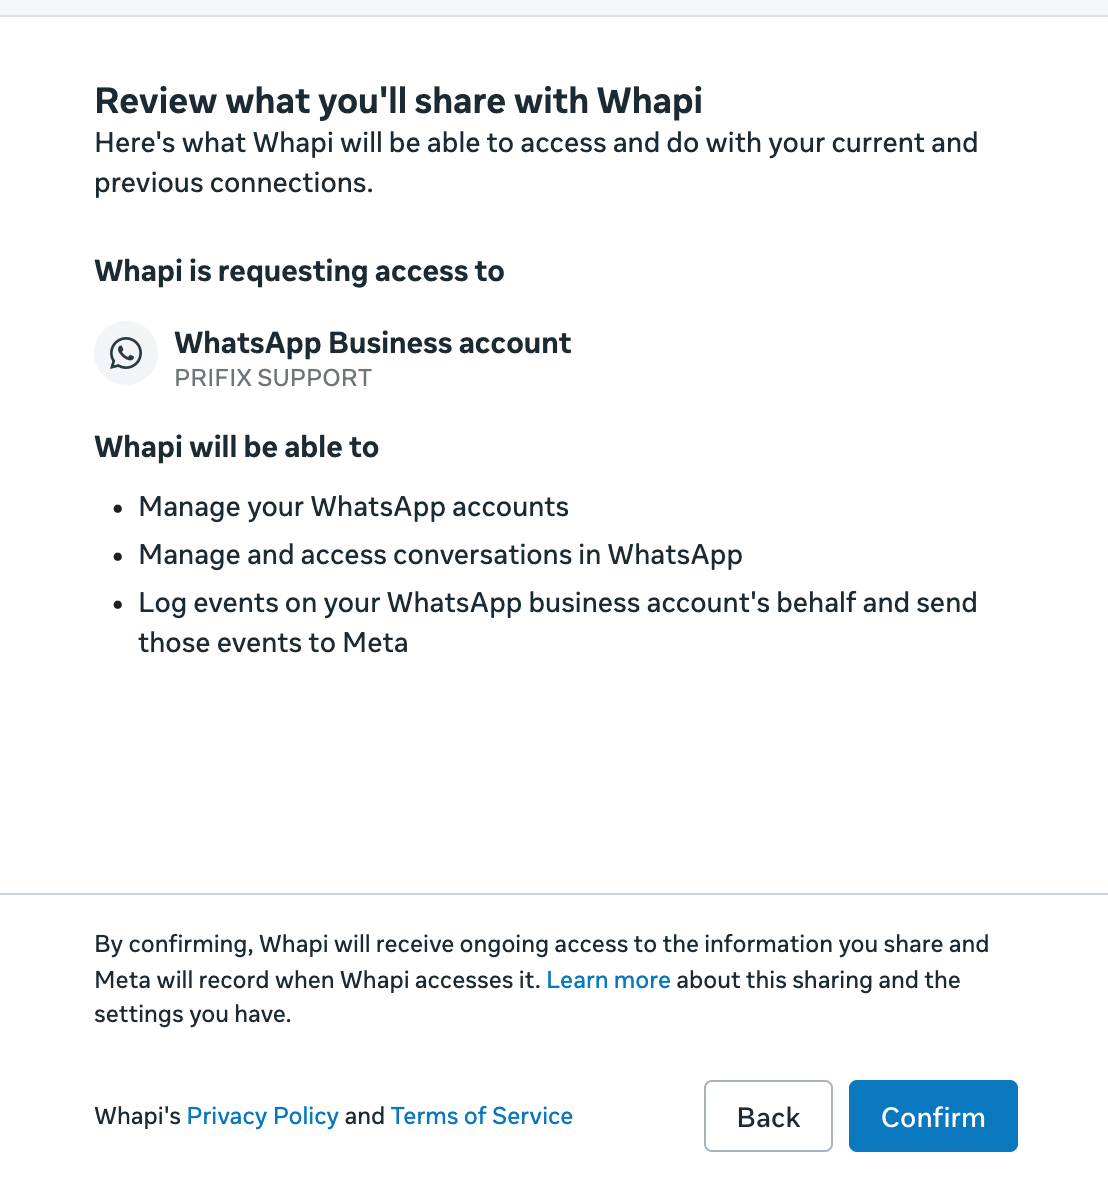
Review and Confirm
What to do
- 1Review what you are sharing with Whapi (business assets, phone number, account details).
- 2Make sure everything looks correct.
- 3Press "Confirm" to complete the connection.
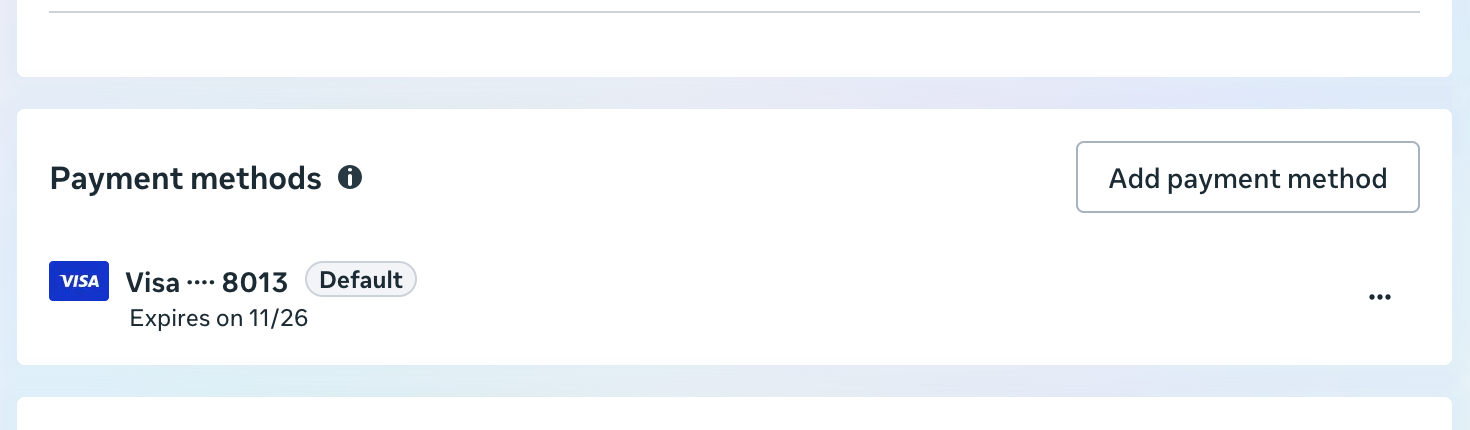
Add Payment Method on Meta
What to do
- 1In Whapi, you will see a second step prompting you to add a payment method. Click on it.
- 2You will be redirected to Meta Business Suite billing page.
- 3Add a credit or debit card.
- 4Set the card as "Default" (not backup).
- 5Add your Tax ID if required by your country.
Common issues
Payment eligibility error (131042)
Payment method not properly configured.
Fix: Set the card as default (not backup). Add your Tax ID. Remove and re-add the card. If still blocked, raise a support ticket to Meta through your provider.
Cannot add card
Meta billing system issue.
Fix: Try a different card, use a different browser, or retry after a few hours.
Create Your First Automation
What to do
- 1In Whapi, go to the Automations tab.
- 2Click on the automation you want (e.g., COD Confirmation, Abandoned Cart).
- 3Customize the message template or use the default.
- 4The template will be submitted to Meta for approval automatically.
Common issues
Template rejected
Meta classified it as marketing or found unclear content.
Fix: Rewrite the template as a utility message. Remove promotional language, discount codes, or CTAs. Resubmit.
Template stuck in review
Meta review delay.
Fix: Wait 24 to 48 hours. If still stuck, duplicate the template and resubmit. Avoid editing templates that are under review.
Test and Go Live
What to do
- 1Once your template is approved, click "Send Test Message" in Whapi.
- 2Enter your own phone number to receive a test message.
- 3Check that the message looks correct on WhatsApp.
- 4Enable the automation. You are live!
Common issues
Messages sent but not delivered
Meta delivery issue or account restriction.
Fix: Check your account status and quality rating in Meta Business Suite. Verify billing is active and card is set as default. Contact support if it persists.
Message undeliverable (131026)
Recipient number is invalid, not on WhatsApp, or has blocked you.
Fix: Verify the recipient number is correct and has an active WhatsApp account.
Good to know
Whapi only sends messages
Billing and delivery are handled by Meta. Whapi charges zero markup on Meta fees.
Use an active number
Always use a real, active WhatsApp Business number. New or inactive numbers may fail eligibility checks.
Need help?
Contact us at info@usewhapi.com or message us on WhatsApp.
Ready to get started?
Install Whapi on your Shopify store and start automating WhatsApp in under 5 minutes.